Showing posts with label Finish It Up Friday. Show all posts

Saturday, June 27, 2015

Rosebud - A Finished Shawl


In May 2014, I started a small Rosebud (Pattern by TinCanKnits) Knit-Along with a couple friends. I found the perfect yarn by Swans Island at our local shop. It's a gorgeous raspberry color with slight variations in the color to add depth. And it's soft - so, so soft.


As it happens, it took me almost a year to finish. I would squeeze in rows here and there where I could. It's been a busy and somewhat crazy year, so progress was slow, but in looking back over a year of pictures I realized that this shawl featured was a nice addition to many family memories.


I knew relatively early on that this was not going to live with me when it was done, but with a dear friend that I "met" through our lovely crafting community on Instagram. I've known Raquel for over a year and from the start, I was so moved by what a sweet and loving person she was, both online, and through our emails back and forth.


In a shocking turn of events (shocking because I NEVER do this sort of thing), my a close friend from home and I traveled to meet another friend from Boston and the three of us had a short but sweet stay with Raquel in Utah. Truly, it was one of the most special memories in my adult life. For starters, I've never flown any where post-children, without children. (That part was mildly traumatic.) Nor have I really ever had a stretch of days devoted exclusively to friends and quilting together. We laughed, we cried, we cried some more, we laughed till we cried, and we had the best memories. I also discovered Utah quilt shops, and I may have broken my bank, but it was worth it.


I chose to give the shawl to Raquel in person - truly the best way to give a special gift. I was so nervous!


I think she loves it. And I love that it was stitched with her in mind... That truly is my favorite way of giving. Making something for someone and knowing all along that that in between all the stitches are little memories incorporated along its journey in to becoming finished.


We took a little drive to have a little photo shoot on our last night in Utah. This was probably my favorite memory of the entire trip. Here's hoping this is a yearly treat. :)


I'm coming to realize that you can't rush the crafting process. Some projects decide to move along quickly and some need to be savored slowly.

Thank you for popping by!

xo,
Jade

Linking up with Amanda Jean for Finish It Friday.

Friday, June 27, 2014

a cotton blossoms finish

This weeks finish has appeared in more than one blog post over the last year and has been a WIP for about 5 years.

I've been working really hard lately on getting organized (although the state of my sewing room suggests otherwise), clearing out old WIPs, finishing them, or deciding to let go, as the case may be.

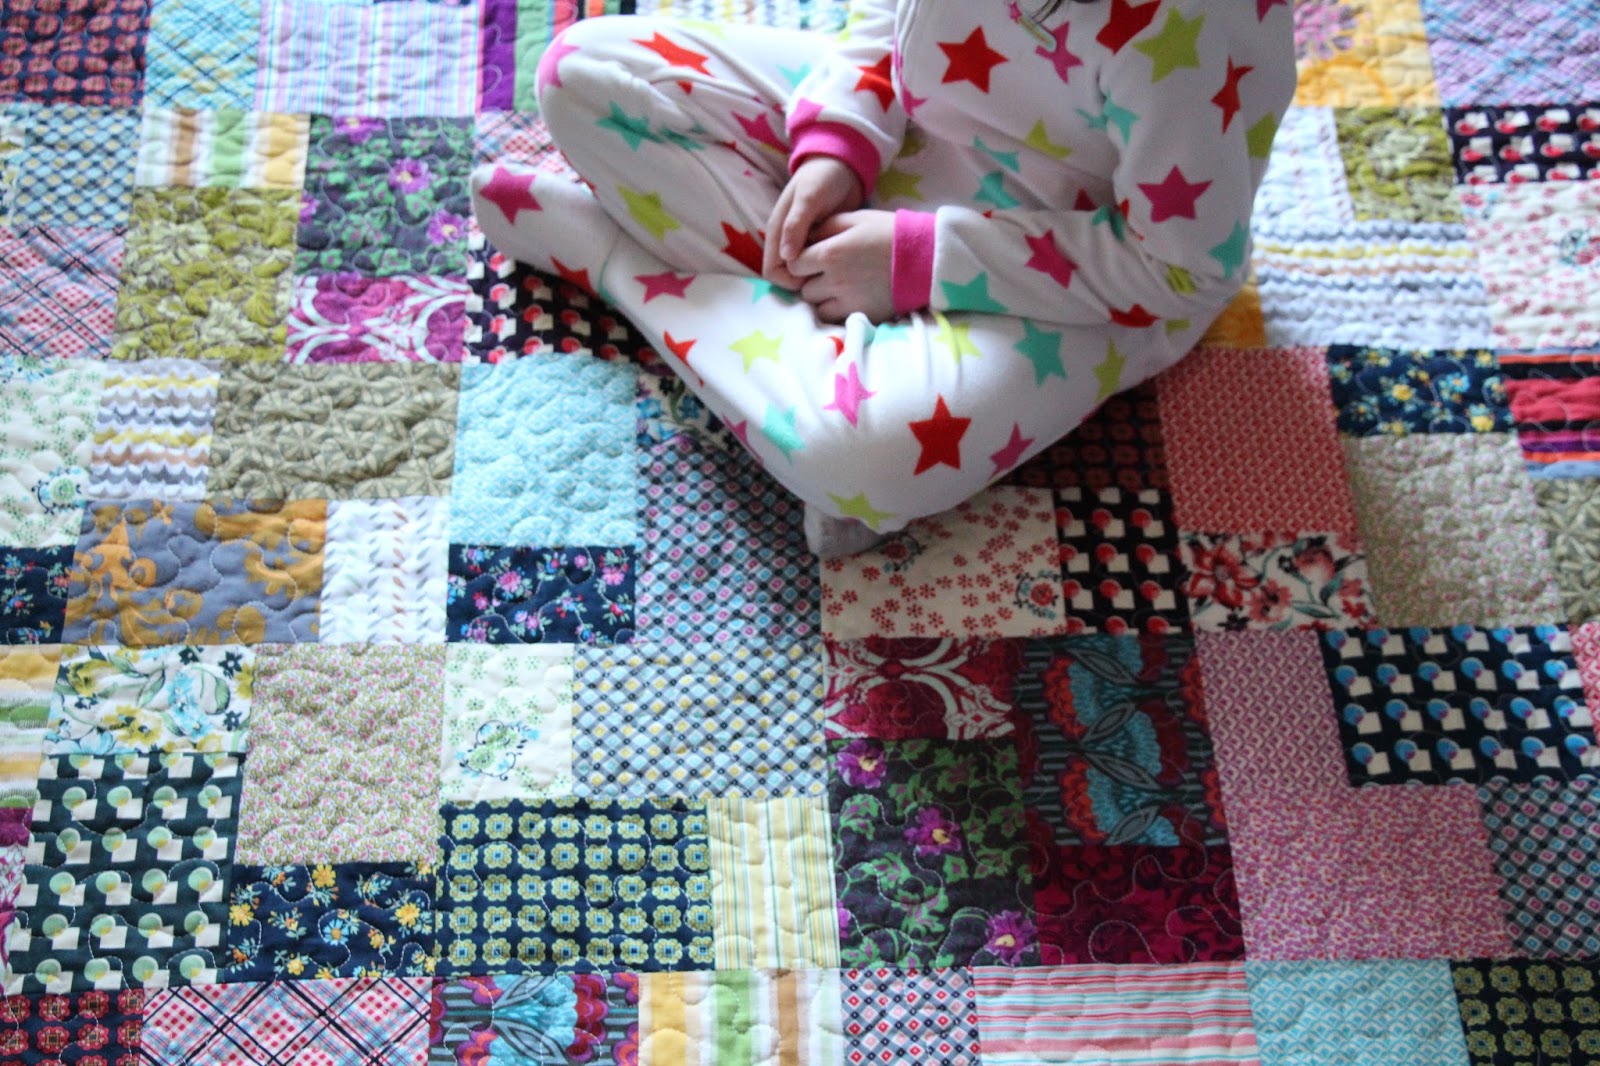
This quilt was started using a pattern called Once Around the Block, designed for jelly roll quilts and charm squares. I knew almost immediately that I disliked it, but I'd already cut out some blocks and (5 years ago) had zero confidence in my skills to change it. And so I lost my motivation and it became a big, fat, guilty WIP (work in progress).

I was really close to donating the project as is and calling it a day. But, I realized that I loved the fabric too much to do this.
After a lot of mulling, I decided I couldn't follow the pattern through to the end and revamped it and modernized it. I kept the blocks I'd made to date, and using the remaining strips (there were tons still) to make new blocks.

For the new blocks, I took the jelly roll strips and pieced basic four patches and which I then framed in linen to make a new type of block which would alternate with the original block. The linen gives a modern feel and texture and a place to rest the eye. It also completely brightened the look of the whole quilt.

The dimensions I used for the new block are a four patch using 2.5" wide jelly roll strips, two pieces of linen, 4.5" wide by 2.75" and then on top and bottom, two strips that measure 9" by 2.75". The block size will be 8.5" finished, or 9" unfinished.


The original block is basically a charm square that is used as the center of a log cabin with jelly roll strips working outwards.


The layout is 9 rows of 7 blocks, giving the quilt a finished size of 60" x 77". This includes 32 original blocks and 31 new blocks.

Once I'd changed the pattern, I fell in love with this quilt again, and couldn't wait to finish. I backed it in a cuddly minky fabric. For quilting I used an all-over loopy stitch - which has become my new favorite all-over design. It's SO fast. And since there were still lots of strips left over, I made a scrappy binding, also a new favorite.


This soft and cozy quilt will be headed to a family member that I love and haven't seen in years as she lives on the other side of the continent. I am SO happy I didn't give up and figured out a way to make a quilt that I both love and can be proud of in the end. I cannot wait to get it in the mail.

Photo Credit goes to my oldest son.
Hope you've had an awesome week!

Linking up with Amanda Jean for Finish it Up Friday.


Friday, February 7, 2014

a hexagon quilt, finished

This has been a big month for me. I finally feel like I'm making progress on some old (old) projects that have been sitting around the sewing room.

It is amazing how good that feels.


My first big finish of the year in the world of old WIP's is my Chinese Lantern Hexagon quilt.

I started this quilt around 3 years ago. I was struck by the fabric at a local quilt store and had recently been bitten by the hexy craze. (In retrospect, I believe that this is also where my obsession with teals and turquoises and blues and greens came from.)


The pattern was something I designed myself. It is really simple. I drew a hexagon (using the circle method) onto template plastic using a compass. The radius was 5.5 inches, and from point to point the hexagon measures 11 inches. After using the template to cut out my hexagons, I laid them out in a off-set hexagon pattern, one row with 7 hexagons, and the next with 6 hexagons and a half hexagon on either end.


To stitch them together, I watched a u-tube video on y-seams, and away I went. It only took me 3 years. (In all honesty, the actual piecing didn't take that long... it was all the life in between that was behind the delay. And procrastination - that may have had a part in it.)


In the last year, I completed the quilt top, and then I pieced a lovely quilt back. And then I had the brilliant idea (BRILLIANT) of hand-quilting the entire quilt. I started quilting it, and got pretty far along, but I got hung up on what to do in the middle of the hexagons. I hadn't thought out my plan for quilting when I began, so any ideas I had now wouldn't work with the existing hand-quilting.
 

And then it sat, and sat, and sat, while periodically being rearranged like a piece of furniture. Last week, I snapped. This quilt needed to be done, and it needed to be done immediately, because quite frankly, I was tired of looking at it in its unfinished state. And needless to say, it no longer inspired me with it's current quilting.


 My new bamboo Clover stitch ripper and I got busy.


The next day, within about 2 hours, the quilt was quilted with an allover stipple, and the binding was being prepared. The finished quilt measures 62 x 46 inches. It's not huge, but it's a great lap size.

I finished hand-stitching the binding this week and I am SO pleased that I went with quilting it this way. It had sat around long enough. Now it's done and ready to be enjoyed by someone that really loves it (and that hasn't been staring at it for 3 years).

I know just the person.


Linking up with Amanda Jean for finish it up Friday.


Friday, January 31, 2014

shelbourne falls and friends - a finished quilt

It's been a busy week in the world of quilt finishing. Last weekend, I was able to baste, quilt and bind two quilts, one of which was my shelbourne falls quilt.


I backed this quilt in a nice soft cream minky. It's made the quilt quite lovely in the warm and cozy department as I also used a layer of batting in the middle. Thanks to the wonders of spray basting (with an even distribution of safety pins), I didn't have any problems with layers shifting. This is the fifth quilt I've  made with a minky backing and I love it. My eldest has requested his own, but that will have to wait.

I quilted it using an all over stipple pattern, which finally seems to be coming more smoothly for me. I'm ready to branch out in other free motion quilting patterns now. I machine bound it, given the time crunch and it was ready to go.


The quilt was barely off the machine before I snapped a few pictures, loaded two of my three munchkins into the car, added a suitcase and was on the road for a three hour trip to Seattle. My aunt had planned a surprise anniversary for my cousin and her husband, and this seemed like the perfect quilt for them. They have another member in the family, of the canine variety, named Edgar. Since he is a big snuggler, I included another simple, small quilt that I made just for him.
 

It was a bit of a whirlwind weekend, but it was great to get away and to be with family. I'm hoping these two quilts get a lot of love at their new home.


Linking up with Amanda Jean for finish it up Friday.

Friday, January 24, 2014

a someday finish, finished

I'm not sure what it is about old unfinished projects, but they seem to grow in magnitude as time goes by. They sit and lurk in the back of our minds, their presence a shadow that can be ignored or forgotten until stumbled across again.

Since autumn, my sewing area has been migrating from it's designated location in our office/sewing space to the formal dining table downstairs. We have am enormous table that is perfect for quilting large quilts, and still having a cutting area on half of it. At first I needed the table to help a friend learn to quilt, then to quilt a large quilt and then to work on a couple large projects that took longer then expected. The dining room was great, but my sewing was taking over the downstairs area. Stacks of fabric began popping up, bins of scraps, and then there was the thread. Somehow, thread falling on a hard floor is worse than thread falling on carpet, and it had reached epidemic proportions. In the meantime, sewing room had grown into a dumping ground for fabric, and notions and scraps, and of course, paper. Somehow, the contents of my cupboards were evacuating themselves onto the floor. Thank goodness for doors, right? Wrong.

I finally snapped. For me, the biggest hindrance to creativity is clutter, and not being able to see your workspace.

Over the course of a day or two, I emptied out my sewing space up stairs, and the closet in our office. (It's enormous and just perfect for stowing everything that doesn't need to be dealt with immediately. It also has a door.)

Everything unnecessary has been purged, and everything useful and needed has been sorted, and organized and put away (mostly - this part is still in progress).

While doing this, I stumbled across a memory. I found these really, really old projects, still unfinished.


Around 11 years ago, my Grandmother, and Mom and siblings attended a local craft fair. I was newly married at the time and was just finding my crafty feet after a few years of non-craftiness. My Grandma and I were intruiged by a type of craft where you either knit or crochet with beads that have been woven onto a strong rayon thread/floss. She started the pale blue crochet project above, and I dove right into making a knitted black clutch, as well as a crocheted black scarf.

Within the next year, my Grandma was diagnosed with pancreatic cancer, and passed away six months later. Her scarf was unfinished. It still needed to be blocked and fringed and ends woven in. The family gave it to me to complete, and I tucked it away in a pretty box in my sewing cupboard.

Ten years, three kids and 4 homes later, I found it again. I'm pretty sure it's reappeared over that time, only to be guiltily tucked away again, for someday.

I'd had enough. Within minutes the ends were woven in, and it was soaking in a bowl, ready to be blocked. As soon as it was blocked, my scarf was blocked as well. By that evening, I was making fringe. (For some mysterious reason, I thought that this would be WAY harder than it actually was.) Within an hour, my Grandma's scarf was done.


This March, my Grandma will have been gone for 10 years. She's never met my children, but I know she would have loved them. And now I have a little piece of her, a bit of her work, to share with them as a conversational remembering piece. And, I'm pretty sure my daughter would love this scarf. (I've caught her gazing at it adoringly, being a fan of all things sparkly.)


Too often, we let the things that are not present in our day to day life be forgotten. Like old projects, memories too need to be pulled out, and dusted off, and loved.


As for the other two projects in the top picture, I still haven't decided if I'm going to add a fringe to my scarf or leave it be, and I'm looking for a clasp for the clutch. Still, they are well on their way to being finished.


Linking up my finish with finish it up Friday.

Saturday, November 23, 2013

"starstruck", a finished quilt and lessons learned

If you've been following my blog for any amount of time, you have probably heard me going on and on about my star-flower quilt along quilt. I've been working on it since mid-summer. I'm happy to say that it is finally (FINALLY) done. Pieced, basted, quilted and bound. I don't think I've ever been happier to finish a quilt.


I'm calling my quilt "star struck". It measures 66 inches by 72 inches. The fabrics are Happy Go Lucky, by Bonnie and Camille, some Avalon, and a few other stash fabrics that I had on hand. The backing is Aqua Kona Cotton.

The back was pieced with the remaining diamonds from the top. I included a few tiny stars made from the little scraps left over. I love it.


I free-motion quilted it using stacked lines within the stars and stippling everywhere else. I am hooked on free-motion quilting now. And it doesn't scare me anymore, so that's something.


It was bound in a red and white bias print from the "Scrumptious" line by Bonnie and Camille.
I need to get more of this print. It is so pretty.


It's been a bit of a journey. Here's what I've learned:
-    Know what you are getting into when you commit to a project
-    Backstitch at the beginning and ending of seams
-    Take the time to fix your mistakes when you figure this out, even after your quilt top has been sewn together.
-    Remember it's just fabric.... It's really hard to wreck it and if you do, the world won't come to a halt
-    Stretch your comfort levels... Try new things or techniques that intimidate you
-    Be inspired by other crafters but don't compare
-    Press, press, and press some more
-    Break the quilt down into chunk sized tasks
-    Be proud when you accomplish one of these tasks
-    Press your seams open
-    Don't bite off more than you can chew (ie. a really complicated quilt back)
-    But if you do, chew it well, and admire the effect
-    Sleep periodically
-    Don't be annoyed when your family asks for dinner.... Again.
-    If you are having a bad sewing day and making really obvious mistakes, put it down and try again tomorrow
-    Know when to pick out stitches and when to embrace them
-    Remember. It's just a quilt... Not brain surgery. No one will die (or even notice) if you make a mistake. Hopefully.
-    When you've put upwards of a hundred hours into a project, savor every stitch of the binding. Revel in it. You are almost there.
-    When free-motion quilting, periodically re-tighten your machine foot. Apparently they can wiggle loose.
-    Try to remember that you have children needing to be picked up from school. (If applicable)
-    When doing that, try to remember not to show up at the school looking like you've been hiding in a cave for a year with thread in your hair.
-    Do your best, not someone else's.
-    Know when to give up on an idea if you just don't like it. Don't be afraid to take time and re-evaluate.
-    Blink when quilting. (Took me a while to figure out why my eyes were hurting.)
-    Acknowledge that your quilt will not be perfect. BUT, it will be perfect for you.
-    Bury your thread knots as you go.
-    Know when to take a creative "break", but remember to come back.
-    And most of all ... don't give up.


Linking up with Amanda at Crazy Mom Quilts for finish it up Friday.

Saturday, October 12, 2013

good intentions vs. a new project... and finish

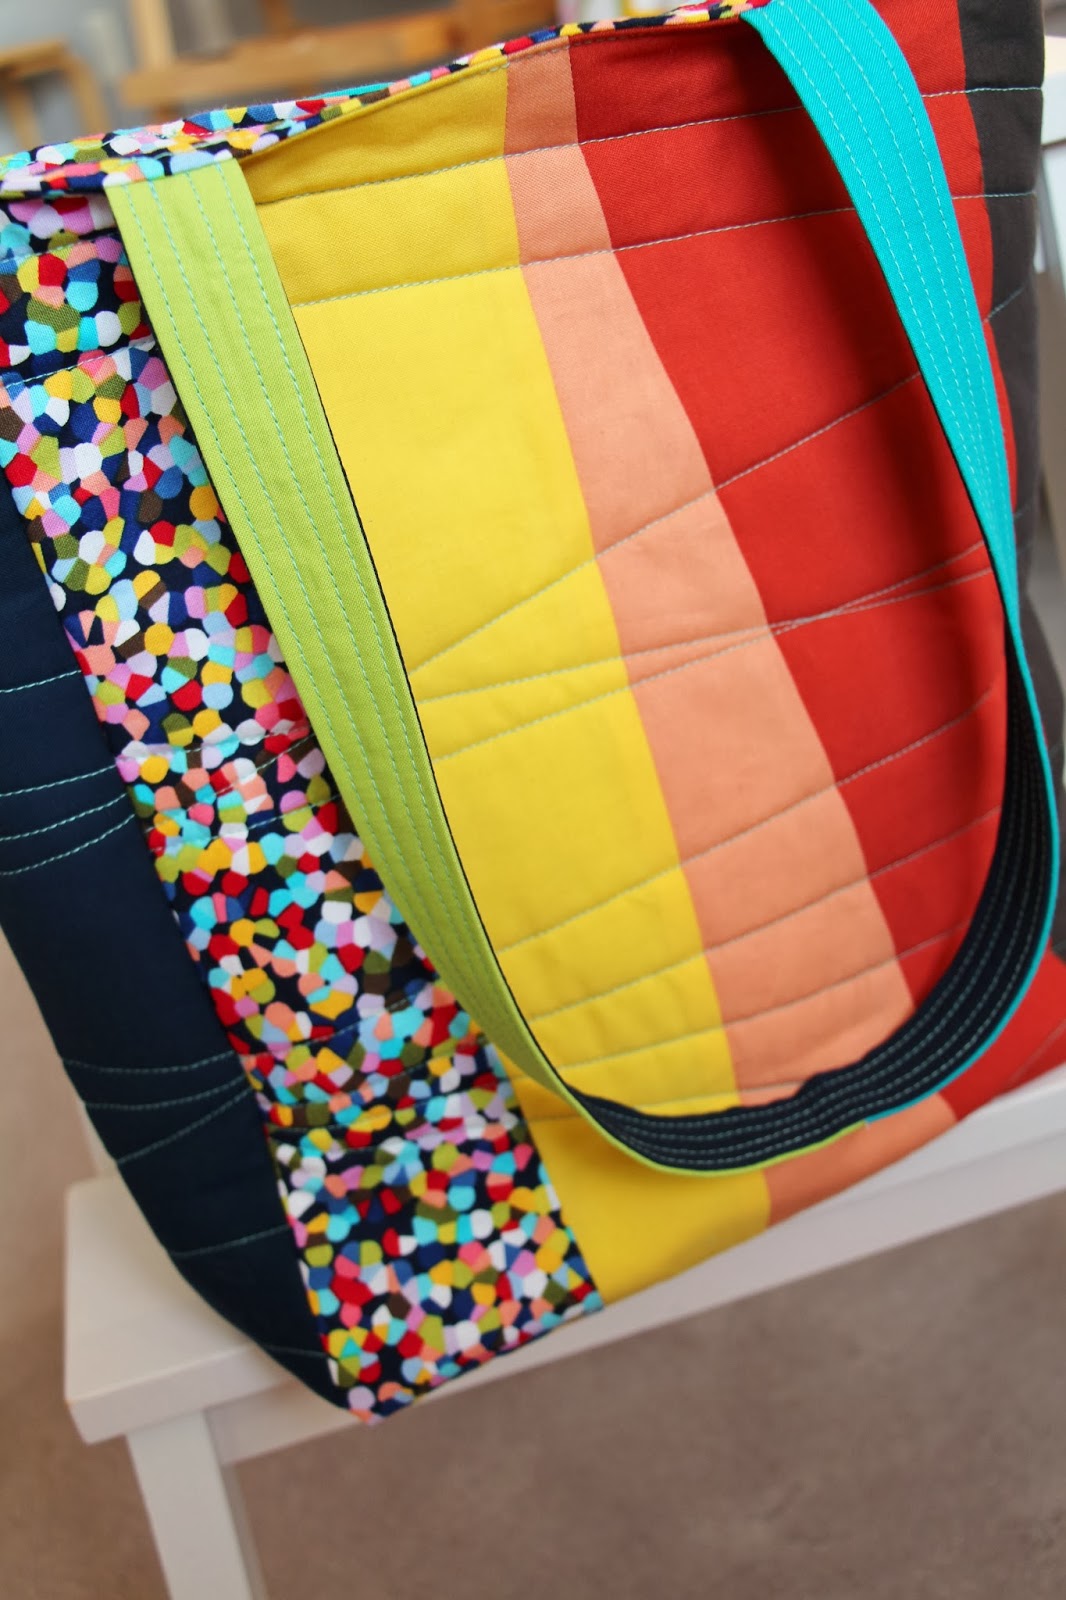
Today's project is something I've been thinking of making for a LONG time. It could even fall under the category of "necessity". My daughter has needed a bag for our congregation meetings so she can hold her books and pencils and pad for a long, long time. She had been making do with a little purse I had made her when she was even tinier, but it could only hold a small amount of things, and they had to be small things, at that. There is a distinct shortage of bags out there for children that are not heavily branded with logos and cartoon characters.

I've been mulling over HOW to make this bag for awhile now. I knew it needed to be versatile, tall enough to handle large notebooks, have pockets, and be able to go with most outfits my daughter would wear. I'm really annoyed I didn't find any solids that were pink or purple in my stash to incorporate, but I think it turned out well, regardless. And of course she found the only bit of pink in the bag.


After massive amounts of Pinterest exploring and pinning, I was inspired to make a Chevron Zakka style bag. I was drawn to a few that I saw using solids. I decided to do a fabric pull and gather solids that went from dark and cool to bright to warm and dark, in a sort of inaccurate rainbow. I incorporated navy, brown and a few blues and a few yellows/orangey reds. For fun, and to tie it all together, I used a great print called "Paint Box Primary Pointilism". It's fantastic. And it has pink (I mention this twice - it is that important.)


After reading up on a few basic bag making pointers, I went to town. This was such a fun challenge. More and more lately I find I'm letting myself design things without patterns. In the old days, I would have been unable to make this without a pattern firmly in my grasp. There were a few trial and error moments, but for the most part, it came together perfectly. I wanted the finished product to be quilted. I chose a light aqua thread and did some improv straight-line quilting. For sturdiness, I used fusible fleece. And for the inside pockets, I used a heavyweight interfacing. 


I made the pocket with four different colors, to add a little extra zip to the inside of the bag (as though the lining weren't enough).


Another favorite feature is the handles. I LOVE them SO much. 


Probably the hardest part was lining up the offset triangles to make the chevron. If I were making this again, I would use a different method to do that. 


I suppose the upside to abandoning my pile of WIP's to make this is that it's finished. 
I think it should be called "Seasons".


It's a little bit of fun, a whole lot of color, a tiny bit of art, and best of all, practical. My job is done. And my daughter loves it. 

Linking up with Amanda at Crazy Mom Quilts for Finish It Up Friday.
Friday, September 27, 2013

Finally!

Today's post will be short and sweet. You have heard me going on about finishing my star flower quilt top for quite some time. (Way too long!)


I'm happy to report that with the exception of some borders (awaiting the last step in the tutorial), this baby is done. I will focus on my backing piecing next.

I love absolutely everything about this quilt. It's bright and happy and every single star has polka dots. It's definitely been worth the effort.


The hubby has dropped the hint that maybe I should work on his "not quite a surprise" quilt while I am waiting for the tutorial. Sounds like a perfect plan!

Linking up with the always inspiring Amanda at Crazy Mom Quilts.

Friday, September 13, 2013

Mothers and Daughters

Today's finish is a somewhat unexpected project. It just happened. This just might be the best kind of starts and finishes.


My niece, owner of the quilt in this post, has a mother that is a baker. (This, by the way, is a dangerous sort of person to have in the family... calories seem to migrate this way much too frequently.) She is a wonderful sister-in-law, and to see her and my brother's family grow has been so precious.

It occurred to me one morning, while snuggling my littlest, that the tiny little fingers belonging to my niece will soon be wanting to help her mama in the kitchen. And that means she needs an apron. And ...  I just happened to have some leftover fabric from her quilt.

 
I didn't want to go out and buy a pattern. It seemed like it would be a simple enough thing to draft my own and create it. Completely unexpected was just how much I loved this process. Within an hour or two, her apron was made with just a couple finishing touches left to do, the little bits that make it special.


It is made in a toddler size, that could go up to about 5 or so. I took a couple shots of my daughter modeling the apron (as I don't have an extra toddler about), to give you an idea of size.


This post is about family and growth and traditions passed on, memories made. We are so blessed to have the newest little hands in our family.


Linking up to CrazyMomQuilts for Finish it Up Friday.