Showing posts with label Rainbow. Show all posts

Wednesday, January 20, 2016

round and round

When I joined the local Modern Quilt Guild in Vancouver, I was stunned by the sheer inspiration that one meeting could provide. The Round Robin project was introduced the following year and while I secretly wanted to join, it was too much of a commitment at that point in my life. Flash forward to the next years Round Robin - I decided to jump in.

It's such a novel concept. Begin by making the center block and journaling what direction you would like your round robin to take (ie. color scheme, low volumes, batiks, black and white, etc.), and bring it to the meeting. That meeting you take home a different quilt block in an anonymous numbered bag. Every month, the round robin coordinator instructs the participants on the theme that month (for example, curves, triangles, improv...) and how many sides to add on to the quilt as well as what size to make the sides. Every month, you switch bags with another anonymous bag/project.

This was my starter block.
I really enjoyed the process, but I'm not going to lie. It seems I have a problem with procrastination. This comes as a big shock, I know. For some months, I found that my perpetual procrastination actually provided more inspiration as it forced me to be creative or use improvisational piecing, but as a rule I wouldn't recommend it.

This past week, I received my round robin back after it completed a year of rounds. I was just a teeny bit excited.


The amount of talent that went into this quilt is incredible. Every month is a so wonderful. This will definitely be a quilt that has hidden treasures, yet to be discovered, with each use.


These stars are SO awesome.


Color order makes me so happy.


My plan is to continue to add to it, side by side as though continuing the round robin, to make it bigger.


This one will not be lingering in the WIP list for long. I can't wait to get it completed so I can use it. Also, one day I'll remember to thread check BEFORE I take pictures. I just couldn't wait to share this with you.


This is definitely going to be my pick me up quilt. It's just so happy. Who wouldn't be happy snuggling under it??


Friday, January 23, 2015

i'm hooked - my first sew-together bag

Months ago, eons really, I bought a pattern. And I read it, and re-read it and watched so many beautiful versions of this pattern pop up on Instgram. But, despite having sewn literally 100+ zipper pouches in the past year, this pattern terrified me. It's the "sew-together bag", by Sew Demented.

But here we are. I finally bit the bullet and now I'm hooked.


This first pouch isn't for me but was made with someone special in mind. I used a few of my slightly hoarded April Showers fabric and made the exterior with a rainbow medley of scraps and Essex linen.


Amanda Jean of "Crazy Mom Quilts" mentioned online that she used a tip from a fellow quilter Stephanie, that helped out in the zipper department. I thought I'd blog about what that tip was since it helped out so much.

Assuming you've bought the pattern and have progressed to the part where you attach the shorter zips to the fabric, Stephanie recommends capping the zipper with a bit of fabric to make sure the side seams do not include zipper, which makes for a quicker, thinner seam.


Cut a piece 1 3/4" wide by 3" long (this is long enough for both sides of one zipper). Iron it in half lengthwise and then open it. Iron both long edges towards the center crease and press. Fold the piece in half again lengthwise, thereby enclosing any raw edges within the casing. Cut in two pieces. Trip your zipper to 8 3/4" long and cap both ends with the fabric casing. Stitch in place. Proceed with the pattern.


It's a great pattern. I didn't realize how big it was going to be. I cannot wait to make one or 5 for myself and the projects that are currently floating around in plastic bins, baskets and cans. 


My son may have also requested a Transformers sew-together bag, but that's going to take some time to figure out. :)


So if you are like I was and drooling over every bag you see out there, do it! If I can do it, you can too.


 Linking up with Amanda Jean for finish it up Friday.

Follow my blog with Bloglovin


Sunday, January 11, 2015

A Scrappy Norway Quilt

For Fall Quilt Market, Camille Roskelly of Simplify released a gorgeous quilt pattern called "Norway". I immediately added it to my "one day" list. I just love the blocks.

My initial plan had been to make it the way the pattern indicated, with each block dedicated to a fabric. But then I started thinking about a scrappy look... and that was it. Once I had it in my head, I couldn't stop thinking about it.

It all started with this block, to see if a scrappy look would work.


 And then there were two.


Then, nine.


And after a whole lot of rearranging, a quilt top!


And, since I'm not the type to let a quilt top linger, it was basted and quilted in record time (for me). I tried something new and practiced swirls with the periodic hook as a quilting design. Once I found the rhythm of it, I fell in love. It's my new favorite quilting pattern. And when the quilt has been washed and is all crinkley and gorgeous, the texture is phenomenal.

The weather hasn't cooperated lately, so I had to take what I could get for a photo shoot. I bundled up the three kids and took them for a cold, misty walk.

There is a definite advantage to having children available to hold quilts.


For the backing, I pieced yet another Norway block in grey and added two fabrics from Emmy Grace by Bari J. The darker fabric is voile and it makes for such a luscious quilt. I can't get over how soft and lightweight it is. This will be the perfect summer quilt. 


This is the last one, I promise. (By this point in the afternoon, the kids were hankering for hot chocolate and carrot cake.)


This has been such a fun quilt to make. I love the rainbow spectrum that I worked into it. I love that the top is made entirely of scraps. With such a grey and cold winter, a happy quilt is exactly what we needed.


Saturday, October 12, 2013

good intentions vs. a new project... and finish

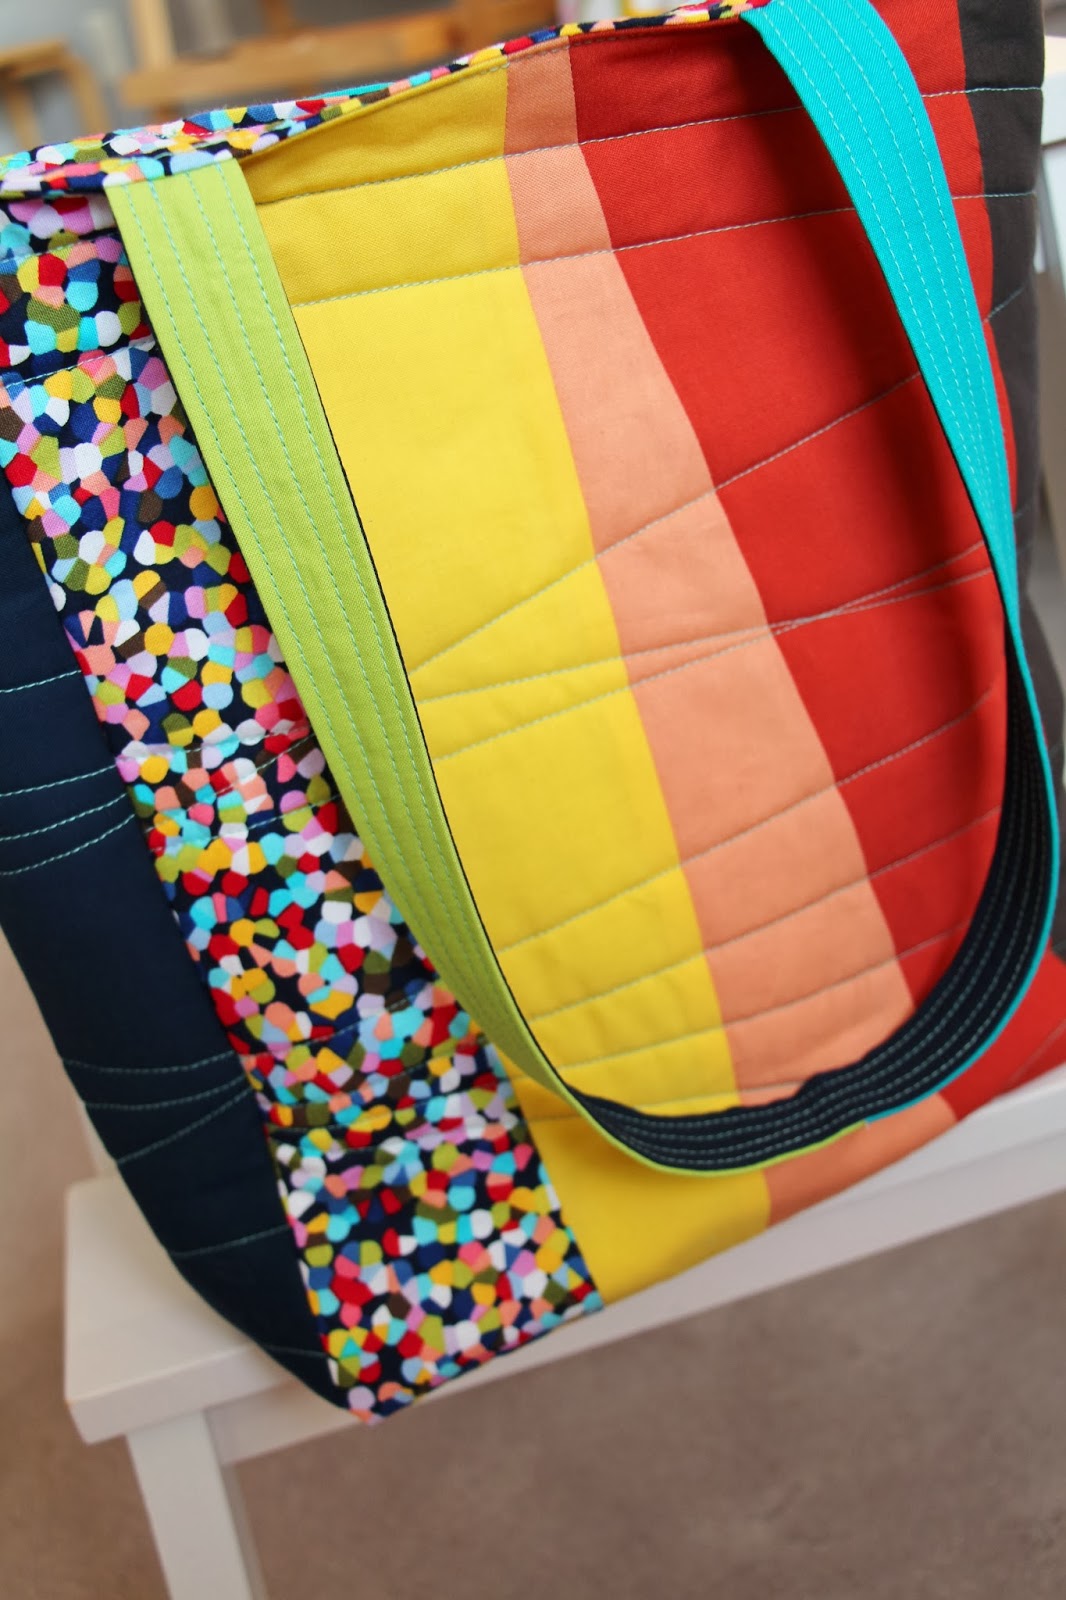
Today's project is something I've been thinking of making for a LONG time. It could even fall under the category of "necessity". My daughter has needed a bag for our congregation meetings so she can hold her books and pencils and pad for a long, long time. She had been making do with a little purse I had made her when she was even tinier, but it could only hold a small amount of things, and they had to be small things, at that. There is a distinct shortage of bags out there for children that are not heavily branded with logos and cartoon characters.

I've been mulling over HOW to make this bag for awhile now. I knew it needed to be versatile, tall enough to handle large notebooks, have pockets, and be able to go with most outfits my daughter would wear. I'm really annoyed I didn't find any solids that were pink or purple in my stash to incorporate, but I think it turned out well, regardless. And of course she found the only bit of pink in the bag.


After massive amounts of Pinterest exploring and pinning, I was inspired to make a Chevron Zakka style bag. I was drawn to a few that I saw using solids. I decided to do a fabric pull and gather solids that went from dark and cool to bright to warm and dark, in a sort of inaccurate rainbow. I incorporated navy, brown and a few blues and a few yellows/orangey reds. For fun, and to tie it all together, I used a great print called "Paint Box Primary Pointilism". It's fantastic. And it has pink (I mention this twice - it is that important.)


After reading up on a few basic bag making pointers, I went to town. This was such a fun challenge. More and more lately I find I'm letting myself design things without patterns. In the old days, I would have been unable to make this without a pattern firmly in my grasp. There were a few trial and error moments, but for the most part, it came together perfectly. I wanted the finished product to be quilted. I chose a light aqua thread and did some improv straight-line quilting. For sturdiness, I used fusible fleece. And for the inside pockets, I used a heavyweight interfacing. 


I made the pocket with four different colors, to add a little extra zip to the inside of the bag (as though the lining weren't enough).


Another favorite feature is the handles. I LOVE them SO much. 


Probably the hardest part was lining up the offset triangles to make the chevron. If I were making this again, I would use a different method to do that. 


I suppose the upside to abandoning my pile of WIP's to make this is that it's finished. 
I think it should be called "Seasons".


It's a little bit of fun, a whole lot of color, a tiny bit of art, and best of all, practical. My job is done. And my daughter loves it. 

Linking up with Amanda at Crazy Mom Quilts for Finish It Up Friday.